
If you have a bacon lover coming to Thanksgiving dinner, you need to make Fried Corn, Sage and Bacon Stuffing. They’ll love the combo of fried bacon, corn, onions and sage. I’m not saying abandon your favorite traditional stuffing, just add this one to the list of dishes you are making. BTW, Are you getting your list together, checking it twice?Want to know how to enjoy Thanksgiving day and not totally go bonkers while preparing and serving the ultimate feast? Two words.I know what you’re thinking.”Go out” See how well I know you??The words are: PLAN AHEAD.
I’m totally into make-ahead for Thanksgiving. You can make and bake a day or two ahead and simply heat up just before serving dinner (see tips below for keeping dishes hot with a cooler or box). Making stuffing ahead is always in my game plan.
Need some ideas for the big day? I’ll be posting almost every day this week. A crock pot dish, a new twist on Cranberry Sauce, a beautiful and simple salad and a step-by-step to a perfect pie. If you want to see my favorites, you can also check out my Pinterest board: Thanksgiving, the most wonderful time of the year.
Get ready. Time to get your Thanksgiving on.
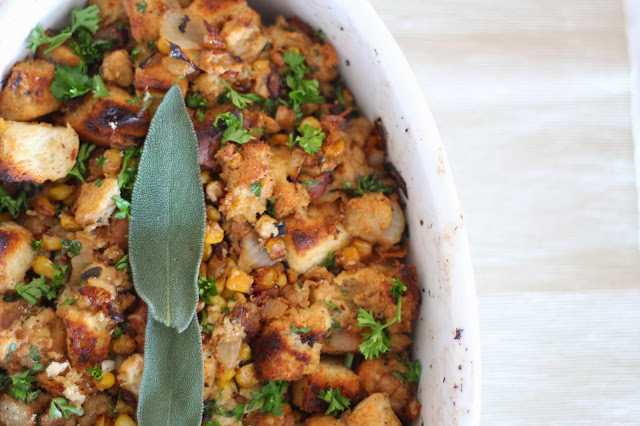
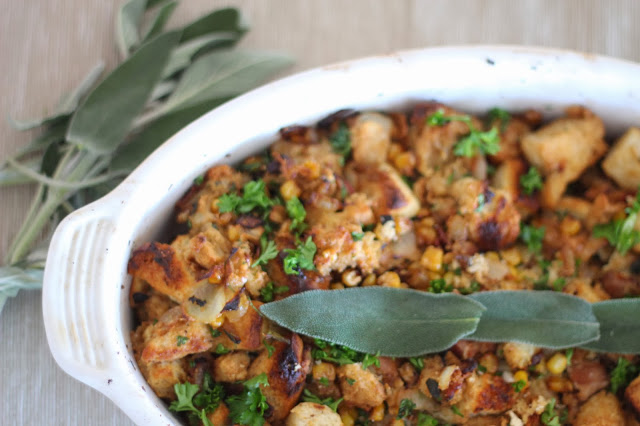
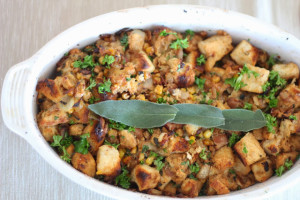
Fried Corn, Sage and Bacon Stuffing
Ingredients
- 1/2 lb of bacon, chopped into one inch pieces
- 2 tablespoons olive oil
- 1 medium yellow onion, chopped
- 1 cup corn, fresh, frozen or drained from a can
- 8-10 fresh sage leaves, chopped
- 1 clove garlic, chopped
- 8-10 cups french bread cubes, dried, or boxed bread cubes for stuffing*
- 4 tablespoons butter, melted
- 2 teaspoons poultry seasoning
- 1 teaspoon salt
- 1 teaspoon pepper
- 1- 14.5 oz can chicken broth
- 1 cup fresh parsley, chopped and divided in half
- additional olive oil for drizzling on top of stuffing
Instructions
- Fry bacon in a pan until crispy. Drain off grease and set bacon aside on a paper towel to drain. Wipe out pan with paper towel.Using same pan, heat to medium high and add olive oil, onion and corn. Fry until onion is soft and corn begins to turn a golden color, about 5 minutes.
- Lower heat to medium. Add chopped sage and garlic, cook for about 1-2 minutes more. Remove from heat.
- Place 8 cups of dried bread in large bowl. Add fried ingredients. Toss in melted butter, poultry seasoning, salt and pepper, chicken broth and 1/2 cup of chopped parsley.
- *If the stuffing is too wet (very sticky and bread seems soggy instead of moistened with liquid, add the additional two cups of bread cubes.
- Place all ingredients into 9×13 or other baking pan. Drizzle with additional olive oil (about 2-3 tablespoons). Cover with foil and bake on middle rack at 375 for about 30-40 minutes total or until warmed through and golden on top. Remove foil for last 15 minutes of baking.
Did you make this recipe?
Be sure to leave a comment and give this recipe a rating, letting me know how you liked it. I’d love to see a photo, tag @abountifulkitchen on Instagram!
Tips and how to make your own warming oven:
-If you would like to prepare this for make ahead, assemble, cover with foil and place in refrigerator. One hour before baking, remove and set on counter. Preheat oven to 375. Bake for about 40 minutes, on middle rack in oven. If the dish is a bit dry, add about 1/2 cup of chicken broth by drizzling on top of casserole before baking. Re-seal foil and bake. Remove foil for last 15 minutes of baking.
-If you need to keep multiple dishes such as yams, stuffing, or mashed potatoes warm and you are short on oven space, or you want to transport dishes and keep them warm, make your own warming oven. You will need a regular cooler or a cardboard box. Line the box or cooler with newspaper. If you are using a cooler, make sure to use a thick enough layer so when you place the hot dish inside of the cooler, it won’t melt the plastic. Cook the dish according to recipe. Remove from oven. Place a layer of foil on top of the dish. Seal edges.
Lay the pan flat in the bottom of a cooler, box or tub. Place a cookie sheet on top of the pan if you need to stack dishes. Try to lay newspaper in between as well, to make an insulted layer.Layer some more newspaper on top of the dish. I have sometimes loosely wrapped the dish in newspaper to add extra insulation if I am transporting and not serving the dish for a while. Close the lid and don’t peek. This will keep dishes hot for about 2-3 hours after baking. The key is to place the dish into the box immediately after removing from oven, and to refrain from opening the box after placing the dishes inside, until ready to serve. Make sure to secure the dishes if you are transporting (stuff the box with extra wadded up newspaper to make sure the dishes do not move around, and don’t leave the box outside in the cold.
Trisha Burghardt
My whole family loves this stuffing! I never really enjoyed stuffing until I made this recipe and it’s just the right mix of flavors.
Si Foster
Trisha,
I’m glad you love this recipe! I hope your Thanksgiving was fantastic.
Thanks for reading ABK!
xo, Si