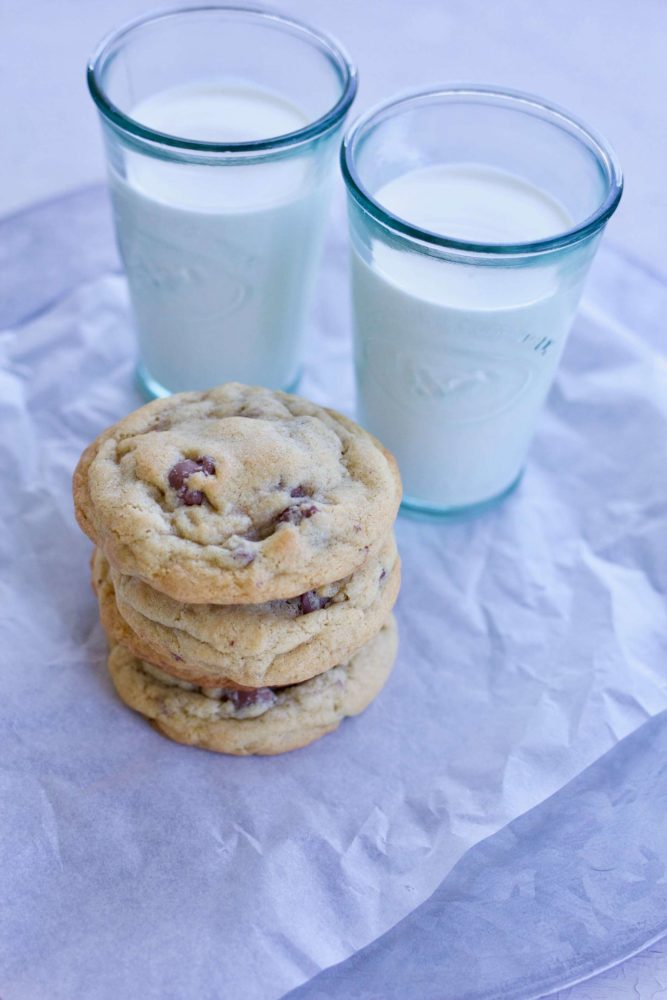
Tried and True Chocolate Chip Cookies are exactly what the name says. Tried. And True. Chocolate Chip cookies that turn out a little crispy, gooey in the middle, perfect every time. The last recipe for classic chocolate chip cookies you will ever need!
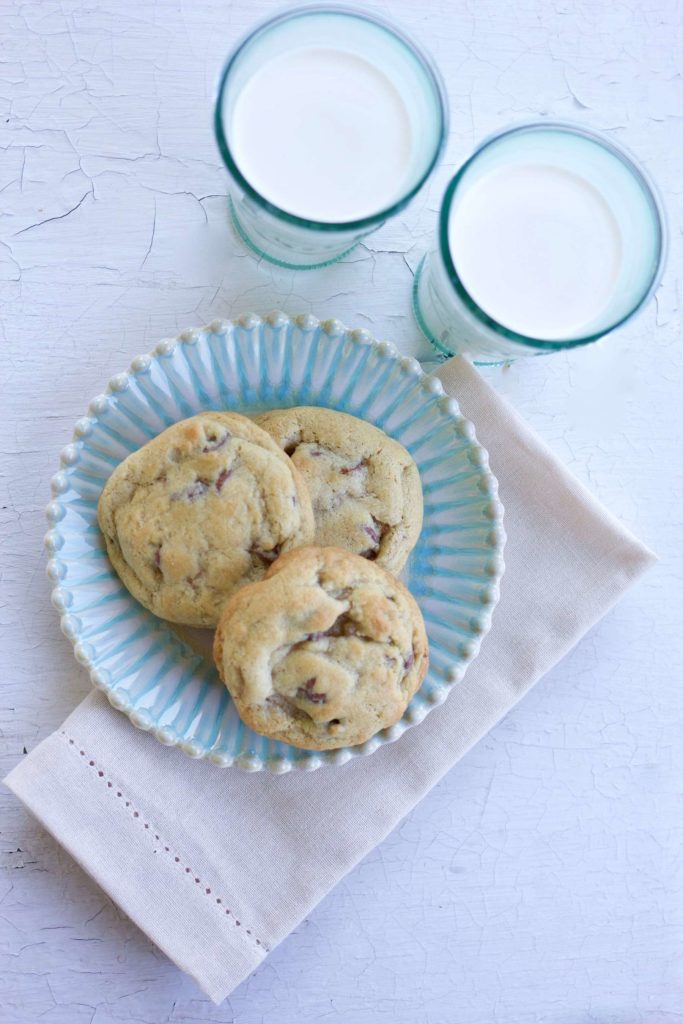
Is there anything better after a long day at school than a melt-in-your-mouth Tried and True Chocolate Chip Cookie? I’ve made lots of chocolate chip cookies in my life, and I’m here to tell you this is the one. That recipe you’ll be known for. The chocolate chip cookie recipe you’ll make over and over and over again.

If you’ve ever made chocolate chip cookies, you’ve probably had a baking failure. Am I right?
Today, we are going to solve that problem. Once and for all.
NO MORE CHOCOLATE CHIP PANCAKE COOKIES
Why Tried and True Chocolate Chip Cookies?
In 2009, after months of testing methods and ingredient combinations for baking chocolate chip cookies, I came up with a recipe that works. Every. Single. Time. Since then, I’ve continued to update, simplify and improve this recipe for Tried and True Chocolate Chip Cookies. I think it is finally in the perfected stage! This recipe is a one bowl, 20 minute (start to finish) success.
History of Tried and True Cookies
Back when my son Stephen was in high school, he and his friend Spence took cookies to friends each Sunday night. They would try to seek out friends who were sick, or needed a little lift at the time. Spencer’s mom, Erin was one of my closest friends. We took turns baking cookies for the boys to share each Sunday.
At the time, I felt like I was constantly on the search for a chocolate chip cookie that was “the one”. A chocolate chip cookie that I could make quickly, without refrigeration and that would turn out perfectly every single time! I was tired of baking cookies that turned out fluffy one time and flat as a pancake the next. I was determined. After too many batches to count, this recipe for Tried and True Chocolate Chip Cookie was born.
A few helpful hints (also listed in recipe notes) explained…little things make a difference!
A few questions I’m asked over and over again about this recipe are about the butter, how long to mix, the scoop, why did my cookies turn out flat? Most of the questions are answered in the recipe notes, but I’ll address a few here as well!
Butter– I use unsalted butter. Straight out of the fridge. Meaning it is not room temperature. If you’d like to take it out before using, I’d give it about 30 minutes on a countertop. I take it straight out of my small fridge, which is kept at 35-36 degrees. The butter is very cold. I place it in the microwave and let it warm up for 18-22 seconds. When I add the butter to the bowl, I cut the butter into tablespoon size pieces so it breaks up more efficiently. This is a key part of the recipe success!
How long to mix the butter and sugars together? This is also key to success. Don’t ever turn the mixer to a high speed. The higher speeds will whip air into your batter and the cookie will be more cake like than chewy. Keep the speed on low to medium speed.
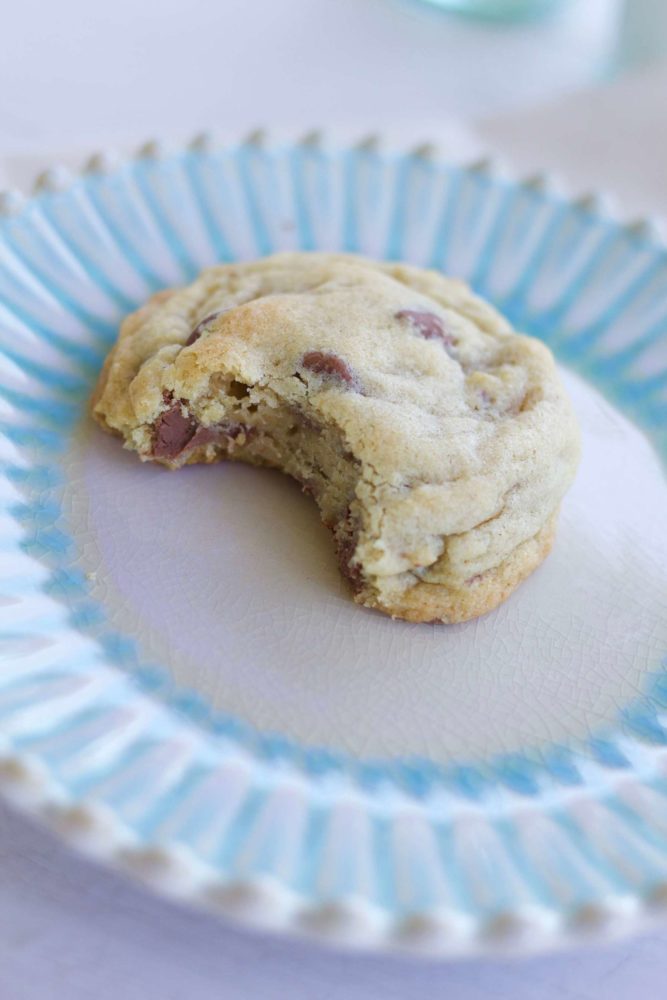
The scoop! I use a #16 scoop which measures about 2 1/4 inches across. It is 3.4 tablespoons. I love this size cookie because it is substantial, without being too large. When I make smaller cookies with this recipe, I always refrigerate the dough first. The smaller sizes don’t hold their shape quite as well, so refrigeration is key when shaping into a smaller cookie. Refrigeration of the dough is NOT needed when making a cookie using a #16 scoop.
The question I am no doubt asked most often is “Why did my cookies turn out flat?” A few of the most often made mistakes are:
- Butter that is too soft. If the butter is too soft to begin with, the batter will naturally spread. Also always make sure to use butter. Margarine won’t work. It will produce flat cookies that don’t set up properly.
- Beating the butter and sugars together until “Light and fluffy”. This is a practice that was used by our mother’s who made a lot of flat cookies back in the day! Beating until sugars and butter are fluffy works for cakes, but not cookies! Less air beat into the batter is better and will produce chewier cookies!
- Use cold eggs. I take the eggs straight out of the fridge. Unlike when making a cake, the eggs are added to this recipe COLD, instead of at room temperature. Another key to success!
- Sifting the flour. Don’t sift the flour! Sifting is great for cakes, but not for most cookie recipes. Also, good quality flour (cheap flours often have lower gluten or protein content) will pay off. Stick with name brands. I love Lehi Mills All Purpose Peacock Flour, Bob’s Red Mill, and King Arthur brands. You will see a difference in your baking. One last tip. Keep the flour stored in your home. Not a cold/hot garage. Also a game changer in baking success!
- Oven temperature. If you suspect your temperature is off, check your oven to make sure it is heating accurately! A simple oven thermometer will save lots of headaches and confirm if your oven temperature is accurate.
Remember, when you are making your first batch of Tried and True Chocolate Chip Cookies, look for a dough that is not too sticky. You should add 2 3/4 cup of flour total to the recipe. If the dough is still wet looking, it’s okay to add another tablespoon or two, but beyond that, the cookies will have a floury taste. Is that a word?? It is best to scoop and refrigerate the dough for 30-60 minutes and then bake as directed if the dough is still too sticky or wet looking.
I’ve made thousands of Tried and True Chocolate Chip Cookies over the years… We recently calculated I’ve made this recipe at least 1,000 times = about 20k Tried and True Chocolate Chip Cookies since it was first published in 2009/2010. Everyone from young neighbor kids to folks in nursing homes love them. I’m guessing they will become your new family favorite too!
Tried and True Chocolate Chip Cookies (2014)
Ingredients
- 1 cup 2 sticks unsalted butter, softened *see notes
- 3/4 cup granulated sugar
- 3/4 cup packed light brown sugar
- 1 tablespoon vanilla extract
- 2 large eggs, cold
- 2 3/4 cups all-purpose flour* plus a tablespoon or two if needed
- 1 teaspoon baking soda
- 1 teaspoon salt, I prefer coarse sea salt
- 2 cups or 1, 12-oz. pkg. chocolate chips
Instructions
- Preheat oven to 375° F. If using convection, preheat to 375 as well.
- For regular oven, place rack in middle of oven. When using a convection oven, you should be able to bake on all racks at one time.
- Cut butter into pieces (about 2 tablespoons each) and place in mixing bowl. I use a Kitchen Aid and power it on 2 (low).
- After a few seconds, add granulated sugar, brown sugar and vanilla extract. Mix on low speed until creamy (this takes just a few seconds). The butter and the sugars should be mixed enough so no chunks of butter are visible.
- Add eggs, beating just until incorporated and smooth. Never turn the beaters on high.
- Using a spatula, scrape down the sides of the bowl and bottom of the bowl to ensure all ingredients are incorporated.
- Add 2 cups of the flour, soda, salt and chocolate chips all together into bowl with butter mixture.
- Add the remaining 3/4 cup of flour to the top of this mixture. Slowly mix the dry ingredients and the chocolate chips together. I have had great success with simply PULSING the mixer at this point. Do not over mix. Turn the dough with a rubber spatula so the bottom of the dough is mixed into the top of the dough. This will ensure the flour is mixed in properly and the chips are distributed evenly.
- If the dough is sticky, add an additional 2-3 tablespoons of flour to the dough. Remove the bowl from the stand if using a stand mixer, and fold in the flour. (This is only necessary if the dough is sticky).
- Using a cookie scoop, drop onto un-greasedbaking sheets, or baking sheets lined with parchment paper. Place 6-8 scoops of dough on each baking sheet.
- Flatten slightly with the palm of your hand.
- If using convection, bake for 7-10 minutes until golden brown.
- If using regular (non convection) oven, bake at 375 for 10-12 minutes.
- Cookies should be slightly golden and the cookie should not look wet on top.
- Cool on baking sheets completely.
Notes
- Only use butter. No margarine. Unsalted butter is best. The butter should be more firm than room temperature butter. I take it straight out of the fridge, and microwave it for about 18-20 seconds. My microwave is not super powerful. Your microwave will probably differ from mine. Start with about 12 seconds and remove butter. You want the butter to be barely soft, as in, when you push your finger into the butter it should barely leave an indentation, but it should leave an indentation. If you have microwaved the butter and it is too soft, you can make the cookie dough and either add an additional 2 tablespoons of flour to the dough or refrigerate the dough for about 30-45 minutes before baking.
- *Our altitude is about 4,400 ft. I use about 2 3/4 cups flour total. The original Toll House recipe calls for 2 1/4 cups.
- Don’t over beat the butter-sugar mixture, or the batter will become too soft, and your cookies will not be beautiful and puffy. They will resemble pancakes.
- Don’t sift the flour.
- Use eggs that are straight out of the refrigerator. Most bake recipes call for room temperature eggs. This recipe is designed for cold eggs. If you use room temperature eggs, the cookies are more likely to spread while baking.
- There is usually a notable difference between using a convection and a standard oven. If you bake at the same temperature, for the same amount of time, the convection cookie will be done, with a beautiful, golden, slightly crispy outer layer. Still soft on the inside. And it will be taller than the cookie baked in a standard oven. Not everyone has a convection oven- if you don’t, you can still bake a great cookie using a standard oven!
- Two of the biggest mistakes made while baking cookies are: 1-Over mixing. This will cause the batter have too much air incorporated, producing a fluffy cookie, instead of a chewy one. As stated in the updated recipe, I usually just pulse the mixer after the dry ingredients are added, which creates more of a folding action instead of mixing. 2-Over baking. Under baking is good! Not under baked to the point the cookie is wet and doughy, but just until the top sets and doesn’t look wet, and the dough looks like it has a bit of a crust.
- Chocolate chips – For semi sweet, I use Nestle Semi Sweet chips. I have also had good luck with Trader Joe’s brand semi sweet chips or Hershey’s Chocolate Chips. Nestle is my favorite for day-in day-out semi sweet chips. For Milk Chocolate, I prefer Guittard Maxi Chips, sold in a silver colored bag.
- If the cookie spreads too much, or the edges are not even, I take a small spatula and push the edges inward to create a cookie that is round. This has to be done immediately after removing from the oven, or remove the pans half way through baking and push the sides in to form a circle. Place pan back in oven and finish baking.
- High Altitude info: Not recommended-directions on Nestle Chocolate Chip package for high altitude- I have tried this variation, and DO NOT like the result. The cookies aren’t quite sweet enough, and have a crispy more cake like texture. Here are the directions on the package: (again I DO NOT recommend using this method, but have printed it here as an FYI) Increase flour to 2 1/2 cups. Add 2 teaspoons water with flour and reduce both granulated sugar and brown sugar to 2/3 cup each. Bake drop cookies for 8 to 10 minutes and pan cookie for 17 to 19 minutes. We are at 4500-4800 in elevation and the directions on this recipe work perfectly! The directions also work at sea level.
- Last tip. Mound the cookie into a ball. I make them about the size of a golf ball. I use a #16 cookie scoop. For years, I just used a spoon, and then shaped them by hand. Make sure to flatten the cookie just a little bit before baking. To yield 18 cookies use a 2 1/4 inch or #16 scoop
Equipment
- stand mixer
- cookie sheet
Did you make this recipe?
Be sure to leave a comment and give this recipe a rating, letting me know how you liked it. I’d love to see a photo, tag @abountifulkitchen on Instagram!
Chiara
Hi Si! Can I use the same recipe but omitting the chocolate chips (so just a plain cookie) or should I add some more of some ingredients? Similar to a sugar cookie, but I would like to keep the consistency of these cookies (and do you suggesting using only white sugar in this case?)
And if to the plain one I want to just add some sprinkles (kind of a birthday cookie), how many grams/cups can I add?
Can’t wait for your reply, I am going to bake them for a friend for an important event and I am so excited to make these with your great suggestions and expertise!
Thanks!
Chiara
Si Foster
Hi Chiara!
Love that you are going to share these with friends! Important events are always a success with cookies! Again, Si recommends following the recipe as she created it because it provides a great cookie and she has tested it many times. Thank you for the kind comments!
Best,
Jillian @ABK Team
Chiara Cosimi
Hello! If possible could I have some clarifications on the below?
– What happens if I use 1 egg plus 1 egg yolk instead of 2 eggs?
– Can I use room temperarure eggs instead of cold, and then make the dough rest more (once after finishing the dough and before rolling into balls, and then one more time after creating the balls and before placing into the oven – in this case should they go into the oven straight from the fridge or after coming back to room temp?)
– In the case of the additional resting time above, since usually baking soda is not good for long resting times and should be cooked almost immediately, can I use a mix of baking powder and baking soda (something like 3/4 t each maybe?)
Thanks a lot!
Chiara
Si Foster
Hi Chiara!
It is so fun to try new recipes and learn new things! Si always recommends following the recipe exactly how it is because she has tried it and tested it many times. The cold eggs allow the dough to have the right consistency and the baking soda is there to help it rise.
Have a great day!
Best,
Jillian @ABK Team
Paula
Hello Si! I LOVED this recipe SO much! I have made it twice in a week and I even doubled it and froze half this last batch. I am kind of new to being brave enough to bake, 1. How do I bake these from the freezer? 2. Just curious, some of your other cookie recipes have baking powder, why did you leave it out on this recipe? Thank you again SO much! I am going to SLC to buy your cookbook this weekend. Have a great week, I am so glad I found you!
Si Foster
Hi Paula!
This is so sweet of you. Take them out of the freezer and let them thaw, it will probably take 15-30 min. Once they are thawed just bake them how you would normally.
Have a great day!
XO,
Si
Tara bate
This is my favorite Chocolate Chip Cookie Recipe! I love the soft yet chewy texture of the cookies. I appreciate the thorough directions and tips. I swear everyone loves this recipe and always wants it. So good!
Trisha Bodily
I’ve made my mom’s chocolate chip cookies for years, but once I tried these chocolate chip cookies, I’ve never gone back! Sorry Mom! They are delicious and turn out perfect every single time!
Sasha Buttars
Truly the best cookies. They are fail proof. My daughter makes them often and loves them even more than me.
Emily
Best chocolate chip cookies!
Catherine
Seriously the best chocolate chip cookie. Cones out perfect every time especially if you follow all the notes.
Natasha D
My family loves these! They have become a tradition that I make for my children on the first day of school.❤️
Kate B
These are our go to cookies. They never disappoint. Perfection. Thanks for sharing!
Danielle
My mom found this recipe years ago and it is a complete game changer. The cookies we used to make always ended up flat, burnt and too crunchy! We haven’t had cookies failed since using all of your wonderful tips and tricks! Thank you so much for giving pictures, detailed instructions and delicious recipes! I get complements every time I make these about how delicious they are and I love directing people to the site so they can enjoy the recipe as much as I have!
Erl
This is my FAVORITE chocolate chip cookie recipe! Perfectly delicious every time! Friends & family request these cookies at every get together. Thank you so much!
Brittany C
I have tried dozens and dozens of chocolate cookies and very rarely come across one that earns the label of “go-to” recipe. This one did just that! It’s perfect! The texture and flavor are perfect. The tips and little details are important and make all the difference. If you follow those, this will be the last chocolate chip cookie recipe you’ll need.
Makaylee
These cookies are AMAZING! I have been searching for a good cookie recipe and these exceeded my expectations! Can’t wait to carry on the tradition of baking cookies and delivering them to neighbors or others in my ward!
Annie Oaks
My go to cookie recipe! Everyone in my family loves these cookies and they turn out every time!
Deborah Payne
This is my favorite A Bountiful Kitchen recipe. It is a never fail recipe for the perfect chocolate chip cookie. My family loves them!
Lisa Rhodes
I have gifted all of my 4 purchased books to friends and and didn’t save one for me! Hoping to win one here! We love these cookies and have made them for Sunday baking traditions. They are a go to and always turn out great!
Sonya Folkman Mauter
Truth: I’ve tried & tried this delicious cookie recipe! Now it’s memorized! Thank you!
Debbie Lewis
Best chocolate chip cookies ever!
Karly Adams
Love this never fail chocolate chip cookie recipe. I make it all the time. My kids love them and I love it especially when I add a little extra dark chocolate chips!
Rebecca Hatch
This is my go-to chocolate chip cookie recipe. They turn out delicious every time and are always requested for family get togethers. Don’t skip Si’s helpful tips / baking epistle.
Meaghan
I would say 75% of the time, these are tried and true! But I feel like I can’t knock a star because it feels like a feeling on my part. Do you have any recommendations about how to avoid having pancake tried and true cookies?
Amy
This is literally the only recipe I ever use for chocolate chip cookies, it’s just the best one out there! Not too sweet, just the right amount of salt and the step by step guide means they’re practically foolproof. My family’s favorite!
Rachel Meldrum
We are at memorized level for this recipe. Cookies always turn out great and dough is even better.
Kiersten Nelson
I should have left a review years ago, because that’s how long I’ve been making these cookies! I can’t tell you how many chocolate chip cookie recipes I tried before finding this one, in search of THE chocolate chip cookie that was both delicious and simple to make. This is it!
I recommend reading through each note for the first few times, because the method is what helps make this cookie perfect. As its name suggests, it is TRIED and TRUE, and the last chocolate chip cookie recipe you’ll ever need. I have made these cookies hundreds of times and I am ALWAYS asked for the recipe. I’ve given it out dozens of times and my friends are never disappointed with their results! Thank you, Si, for ending the search for the perfect chocolate chip cookie!
Si Foster
Kiersten, thank you for taking the time to leave this kind review! I am so glad that you have enjoyed this recipe. Thank you for reading ABK!
Xo
Si
Amy Asper
I’m a chocolate chip cookie snob, and these are one of the best. They are quick, thick and delicious. Everything you need from a chocolate chip cookie.
Shannon
This recipe is so good and so easy. It is one of our go to chocolate chip cookie recipes. When it just works every time you have to keep coming back to it.
TERESA hONE
This is a delicious cookie recipe! It says it in the name as Tried and True!! Can’t ask for more!! So yummy!!
Sharon
These cookies are the best! Love having a go to chocolate chip cookie recipe I can always count on! Thank you!
Melanie Olson
I started making these with my son several years ago. We’ve made a lot of chocolate chip cookies together over the years. Once we tried this recipe, we never used anything else. This has become our “tried and true” recipe, too. Thank you, Si!
Laura Oblinger
I now understand why these are called the “Tried and True Chocolate Chip Cookies!” Because they are for sure “tried and true.” Love that they are soft on the inside but nice and golden on the outside. This is the only CCC recipe you need.
Suzanne Doom
My go to chocolate chip cookie! Make these at least once a month if not more!
Amy Carter
These cookies are the best!! Every time I make them they turn out great, one of many ABK recipes I make often ❤️ thank you!!!
Dana
This is hands down my favorite ABK recipe! It’s the ONLY chocolate chip cookie I make and without fail, someone always asks for the recipe. I make them almost weekly, and have them at all my meetings with the teenage girls from church. I don’t think you’ll find a better CCC recipe!
Canila
I really love and enjoy cooking this. It’s a delicious recipe and it’s perfect for sharing with friends and family at any place any moment ❤️
Camila
Typing mistake 😆
Michelle Hill
The most delicious cookie! Every recipe that I have made from Si has been amazing, I can’t pick a favorite!
Venita dimmick
These are seriously the best chocolate chip cookies. I’ve made you famous in my neck of the woods, sharing the recipe and/or link with everyone I’ve made them for. My husband and son don’t like it if I dare to make any other cookie!
Chelsea Chapman
I love chocolate chip cookies, and I have a recipe I’ve whipped up for years while living in Texas. We just moved to Utah, Davis county! My cookie recipe doesn’t work anymore due to elevation & rental house oven. I was so sad! I remembered that I love your recipes, and with you from Bountiful, I knew where to turn for tried & true cookies! I made these and they’re so good, my new go-to recipe! Thanks for being so descriptive and specific in the instructions so they turn out amazing every time!!!
Janette
These are simply the best chocolate chip cookies. I replaced my recipe of 30 years with this one. I’ve baked 100’s for Christmas and other gatherings. They are known as my “VIP” cookies because of their high quality ingredients. Absolutely delicious!
Josi Farnsworth
This is a great recipe! It’s my go to. I recently tried a sourdough one and my husband said “why? Your other one is perfect. “
Kennedy Allen
My friend brought me these after having my last baby and I immediately requested the recipe from her! These cookies are the softest, yummiest treat and have quickly become a staple around our house.
Whitney
I teach a middle school foods and nutrition class and I use this recipe with the thorough instructions in our baking unit. So easy kids can follow the recipe with successful results every time. Lots of parents have thanked me for teaching their kids to make cookies but the credit belongs with Si! Visiting the ABK site is part of the assignment.
Jessica
These are hands down my favorite go to chocolate chip recipe! Simple, easy to make and they always turn out perfect! I love them!
Jessica Macdonald
These have become some of our favorite cookies. The directions are really helpful to make a thick, yummy cookie.
Lena
Look no further. This is the only chocolate chip recipe you’ll ever need. My kids love them so much, we make them together! My whole family can not get enough of these cookies. 😋
Jill
FINALLY!!! Success with chocolate chip cookies.
Thank you for this recipe & the tips to success with the ingredients! My family is VERY happy 😃