What’s better than the smell of bread baking? If you haven’t ever made a loaf of bread, this is the perfect recipe for you. ABK’S Classic White Bread Recipe is a basic, no-frills recipe for one loaf of delicious classic white bread just like Grandma used to make!

The good old days…
When was the last time you baked a loaf of classic white bread? If you associate bread making with: a huge mess, lots of loaf pans, hours of mixing, kneading, rolling out and rising I’m sure you are not alone!
ABK’s Classic White Bread Recipe takes one bowl, one loaf pan and less than two hours, most of which is rising and baking time. There are so many reasons that you should be using ABK’s Classic White Bread Recipe and making bread at home from scratch!
It’s so much easier than you might anticipate, and so much tastier than anything you’ll buy at the grocery store. This classic white bread recipe is also perfect if you’re not too familiar with bread making. Have I convinced you yet?

One simple loaf of Classic White Bread
When I was a young, my Aunt Gloria taught my mom how to make cinnamon rolls and white bread, which was a new adventure for my mom. I think Aunt Gloria’s recipe for bread made 6 loaves! Yes, 6 loaves.
Back in the day, (my grandparent’s day) people used to make bread, instead of purchase from the grocery store. Most household’s had a day set aside for cleaning, a day for laundry, and a day for baking bread.

Now, we make bread to enjoy a “hot out of the oven” loaf, instead of out of necessity. This recipe makes one loaf of bread, but you can easily double the ingredients to make two loaves!
I use bread flour in this recipe because it gives the bread a bit more of a dense texture, rather than a super light and airy bread. That said, it’s still light, with just enough chew to make it a substantial loaf.

Get out the stand mixer and a few tips…
This recipe was meant for making in a stand mixer, and not by hand. If you don’t have a stand mixer, it can be made by hand, but it will take longer to mix, and you will most likely want to reduce the amount of flour added by 1/4 cup.
One of my biggest tips for bread making is DO NOT add too much flour in the mixing process. If you add too much flour to the dough, it will become difficult to handle or shape, and the rising process will also become inhibited.
Adding flour should be done a little at a time. With this recipe, add the 2 cups of flour initially, then add the remaining flour a little at a time.
When too much flour is added to the dough all at once, the dough takes longer to raise up and can become too stiff to handle. Follow the directions and only add flour as needed. Remember, you are looking for a soft, not sticky dough.
Pass the butter and jam, please
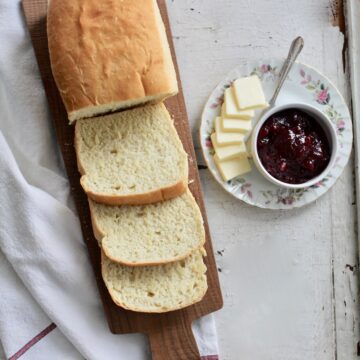
Once the loaf is in the oven, it will fill your home with the most amazing smell. After it’s done baking you will have a tall, loaf of pure heaven!
There are so many uses for this classic white bread. It’s perfect when sliced for sandwiches. You can toast it and slather it in butter and/or jam. IF you have any leftovers (big if) it makes amazing French toast.
The possibilities are endless! If you love this bread, try ABK’s No Fail French Bread, the most amazing loaf of homemade French Bread you will ever eat, or Braided Cheese and Onion Bread .
Classic White Bread Recipe
Ingredients
- 1 1/3 cups warm water
- 2 teaspoons yeast, I use SAF yeast, an instant yeast
- 1 tablespoon sugar
- 2 3/4 cups bread flour, plus 2-4 tablespoons if needed
- 1 teaspoon sea or kosher salt
- 3 tablespoons unsalted butter, melted
- additional 1 tablespoon butter for top of loaf after baking
Instructions
- Place warm water in the bowl of a stand mixer.
- Sprinkle yeast and sugar over water in bowl. Let sit until yeast begins to bubble and foam in bowl.
- Add 2 cups bread flour, 1 teaspoon salt and 3 tablespoons melted unsalted butter to the mixing bowl. Turn the mixer on low speed with the paddle attachment and let mix for 2 minutes.
- Scrape down sides of bowl and paddle and mix for an additional 1-2 minutes on low. Add remaining 3/4 cup of bread flour, a little at a time, just until dough is no longer shiny and wet.
- Scrape down sides of bowl again. Spray sides of the bowl with cooking spray and cover the bowl with Saran wrap. Place in a warm draft free place* to rise about 20 minutes.
- Turn oven on to 375 degrees and place rack in center of oven. Grease a 8.5×4.5 inch loaf pan and set aside.
- When the dough has risen for about 20-30 mins, sprinkle a little flour on top and turn the dough a couple of times in the bowl so it is not sticky. Form into a loaf shape and place in the pan.
- Let rise again for about 20-30 minutes or until the dough is level with the top of the pan.
- Carefully place in preheated oven for about 40 minutes or until top is golden.
- Remove from oven let cool in pan for a few minutes then transfer loaf to a cooling rack. Brush with butter while still warm.
Notes
- To help the dough rise quickly, I rinse the bowl before placing ingredients inside with warm water. This warms up the bowl so the ingredients are never in contact with a cool surface.
- *I love to use the microwave as a place for bread to rise without draft. Heat one cup of water for about 1 minute in microwave. Remove cup of water and discard. The microwave will now be warmed up and ready to be used as a place for the bread to rise. Place the bowl with the bread dough into the microwave. Make sure to cover the bowl of bread with plastic wrap for best results. This will trap all of the heat inside of the bowl and help the bread to raise quicker. remember, do not use the water you heated up in the microwave, it was only used to warm up the microwave!
- The amount of flour you use will vary according to the temperature of the flour, the brand, your altitude, the amount of humidity on the day you are baking. I use about 2 3/4 cups of flour most of the time when baking this bread. Occasionally, a little more. Also, the bake time will vary depending on your oven, altitude, etc. Please watch your loaf carefully to determine how much time you need to bake. If the loaf seems to be getting a little too dark, loosely cover with a sheet of foil. The loaf may take 30 minutes to 45 to bake.
- If you don’t have bread flour handy and want to make this bread, use all purpose flour instead. In this case, reduce the liquid in the recipe from 1 1/3 cups to 1 cup of warm water and then start out with 2 cups of all purpose flour and add additional flour after mixing for the first 2 minutes. All fo the other instructions stay the same!
Did you make this recipe?
Be sure to leave a comment and rate this recipe! I’d love to see a photo, tag @abountifulkitchen on Instagram!
Elle AreSea
I’ve never made sandwich bread before and was nervous but it mixed and rose and shaped perfectly! It’s a gorgeous bread and cuts really well. Thank you for the amazing recipe!
Si Foster
Elle,
Such a sweet comment! I’m so happy to hear that it turned out well!
Happy baking!
XO,
Si
Charlcir
Love homemade bread. The directions were easy to follow. I love it with butter right out of the oven and use the rest for French toast the next day. How long do homemade breads last for? I’ve always been curious.
Kristine Jackson
Use the bread flour it makes all the difference.
Regina McTavish
This is my favorite basic bread recipe! So easy and so yummy! Thanks for sharing this.
Sarah
This is my favorite sandwich bread recipe and I always double it to make two loaves. It also freezes well- I typically let it cool completely, then slice and freeze the whole loaf. When I need a few pieces I separate them with a butter knife and then toast or defrost. I make it so often I have the quantities memorized. Thanks for a great recipe!
Si Foster
Sarah, glad it works so well for you! These are great tips, it sounds like you’ve mastered it! Thank you for kind review and for reading ABK.
XO,
Si
Liz
Yeast cookery has always intimidated me but I decided to try this recipe yesterday and my double batch turned out very well. This despite the fact that the instant yeast I found in my fridge expired in February 2020!
I also mixed in some whole wheat flour that I bought awhile back for making dog treats and the dough rose just fine and turned out beautifully. Sliced up very nicely for sandwiches.
I will definitely be using this recipe again.
Cheyenne oxley
I love this bread recipe so much! It’s easy, it’s fast and best of all so good! We make 3 loafs weekly and eat it all! Have you ever used this recipe for Hamburger or hot dog buns? Totally thinking about giving it a try!
Si Foster
Cheyenne,
I’m so glad you love this recipe. Let me know how you like it as a bun. I think it would work well. Thank you for reading ABK!
xo,
Si
Jill Balli
Hi, the Lehi Roller Mills flour is getting harder to get at Costco lately.
Do you have any other recommendations for all purpose flour?
Thank you for all your recipes. Love them.
Si Foster
Hi Jill,
I just got off the phone with Lehi Roller Mills. They said “flour is the TP of last year!” Lehi is shipping four truckloads per week to the local Costco warehouse, and Costco is selling out as fast as they are receiving it. That being said, here are a few ideas:
1. The SLC (1818 S 300 W) Costco is HUGE. They probably receive the most flour per week.
2. If you call any Costco, they can tell you when the next order is being received.
3. Lehi Roller Mills has a small store right at their mill. If flour is “sold out” online, they may still have flour available in their store. Just call ahead.
King Arthur Flour is also a great brand I recommend. Thanks for your question and thank you for reading ABK. Happy baking!
xo,
Si
Brittany Schiffman
This was amazing bread and so easy to make and fast! I did need to add a bit more flour than it started. I also put them into 3 mini loaf pans instead of a big one and they turned out so great! I just cooked them for 30 minutes instead
Beckie Manning
Since COVID started, I have been making this bread almost every week. It is our favorite! Then I decided to give sourdough a try. I found a soft sandwich bread recipe, and it was similar to this one, but not nearly as good, so after seeing instructions on how to turn your favorite recipe into sourdough, I thought I would try it with this recipe. The instructions are to add a cup of sourdough (227 g), but leave out half that amount—1/2 cup each (113 g) of both the water and the flour, and leave out the yeast. It is a pretty wet dough, and I’ve been making adjustments as I go, but just get it to the point it feels like it usually does when you make this recipe. Because you are just using the natural yeast from the sourdough, the rising time is a lot longer. I like to make the dough up at night and let it sit in the fridge (or cold garage) overnight. In the morning I pull it out and let it sit for about an hour. Then I stretch the dough and fold it, and let it rise for 3-4 hours before shaping it into loaves. (It’s good to stretch and fold it at intervals, but it’s not totally necessary.) then shape it into loaves and let them proof 3-4 hrs—until the dough is rising above the rim of your loaf pan, and they pass the poke test. It may seem daunting with the long rise, but it is just passive time. The health benefits of using sourdough really appeal to me. We have loved this bread. I don’t know if it’s actually true or not, but it seems like it stays softer longer with the sourdough. If you are interested in trying this, I used King Arthur’s starter recipe.
Beckie Manning
I also forgot to mention that it doesn’t give the bread a sour flavor with this recipe. If you want a true tangy sourdough, use a recipe that specifically states that, like King Arthur’s Extra Tangy Sourdough.
Beckie Manning
I love this recipe, and have been making it almost every week during COVID. I ended up buying some larger bread pans (9×5 instead of the size you list), so the loaves were a little short. So, I changed all the measurements to metric after doubling the recipe, and added 8% more of the ingredients (but didn’t fully double the yeast). That has worked really well to make a larger loaf. I love the simplicity of this recipe and the rise times and no kneading make it so much faster! I’ve never been the biggest PBJ fan, but a peanut butter and jelly sandwich with this bread is heavenly!
Judy Noorda
I love your site. When i think I’m going to make something for dinner, i look and you have changed my mind 3 or more times. It keeps it interesting. Thank you for all the great recipes.
Olivia
I haven’t made this yet, but I was wondering if you could substitute the bred flour with all purpose flower since that’s all I have currently at my house.
chris J
Made bread today for the first time since high school home ec class. It was quite simple to make and turned out to be fantastic. According to my wife, it is the best bread that she’s ever had.
Susan
So easy and SO delicious!
Jon Jones
Made it just as you instructed and it’s perfect. AND, it’s my first time making bread ever.
Judy
I have been baking bread for many years and this is my favorite recipe for sandwich bread! First, it is so easy to make. Second, I love the texture and the crust. I didn’t make any adjustments to the ingredients but only bake for 30 minutes instead of 40.
Brenna
I’m throwing out my old bread recipe and replacing it with this! It’s amazing! Thank you!!!
TereSa
Would this recipe work in a bread maker?
Si Foster
Hi Teresa, I haven’t tried making this in a bread maker before but it should turn out just as good. Let me know how it turns out for you!
xo
Si
Kayla
So I tried this recipe and the bread was very sticky. I could barely get it off the paddle attachment. And I added the extra flour. Followed the tips for the all purpose as well. Is it supposedly to be sticky?
Mike R
I had the same issue with my bread with this recipe. I’ve baked tons of bread and this was one of the oddest dough results ever.
Beckie Manning
I’ve had the same thing happen and usually have to add a little bit more flour than called for.
LeE Gia
I’ve tried sooooo many bread recipes. This is fabulous.
Thank you
MarGee Carlen
Loved this one loaf wonder. I honestly have tried so many of ABK recipes and not one as ever let me down in the easy to do or yummy factor. This bread is perfect with dinner, for toast, French toast. You name it. It’s so yummy and so easy.
Liz
I’m excited to try this!
Could it be made with a vegetable or canola oil instead of butter?
Angie Williams
This is a delicious and easy to follow recipe. Thank you! One question. I’ve had some trouble with the bread falling apart after I cut it. Do I need to mix it longer to develop the gluten?
abountifulkitchen
Hi Angie,
I am not sure if this will help or not? Usually, mixing the bread will help the gluten to develop. This is a tender white bread, so yes it does come apart quite easily. If you want a bread that is more substantial, try adding a cup of wheat flour or bread flour and mixing on low with a bread hook for a couple of minutes.
Thanks for reading ABK,
xo
Si
Jeanelle
I’ve never made bread by myself before but I got brave recently and tried this wonderful recipe. It turned out perfectly, was so easy and even better, SO DELICIOUS! Thanks so much, Si! xoxo
Angie Young
I like to make at least 2 loaves at a time–does this recipe double well?
abountifulkitchen
Hi Angie,
This recipe is easily doubled, just make sure you have a large enough bowl for mixing properly!
Thanks for reading ABK,
xo
Si
Jerica
What’s the difference between bread flour and normal all purpose unbleached flour? Thank!!! 🙂
abountifulkitchen
Hi Jerica,
Bread flour has a higher protein content than All Purpose flour. The protein in the bread flour allows gluten to develop and produces more of a dense and chewy texture. Hope this helps!
Si
Shelly
I’m excited to try this! Question about baking bread and cake breads… the middle of my bread takes so long to bake and the outsides get over cooked and hard. Can you give me any advice as to how I could change that?
Si Foster
Hi Shelly, you could try covering the bread in foil halfway through the cooking time. Thanks for asking and hope this helps!
xo
Si