Easy as pie. We’ve all heard that phrase countless times, but is apple pie really easy? To make? Or is eating apple pie easy?? No matter, you have arrived at the right place if you are looking for the Best Easy Apple Pie Recipe in the World!
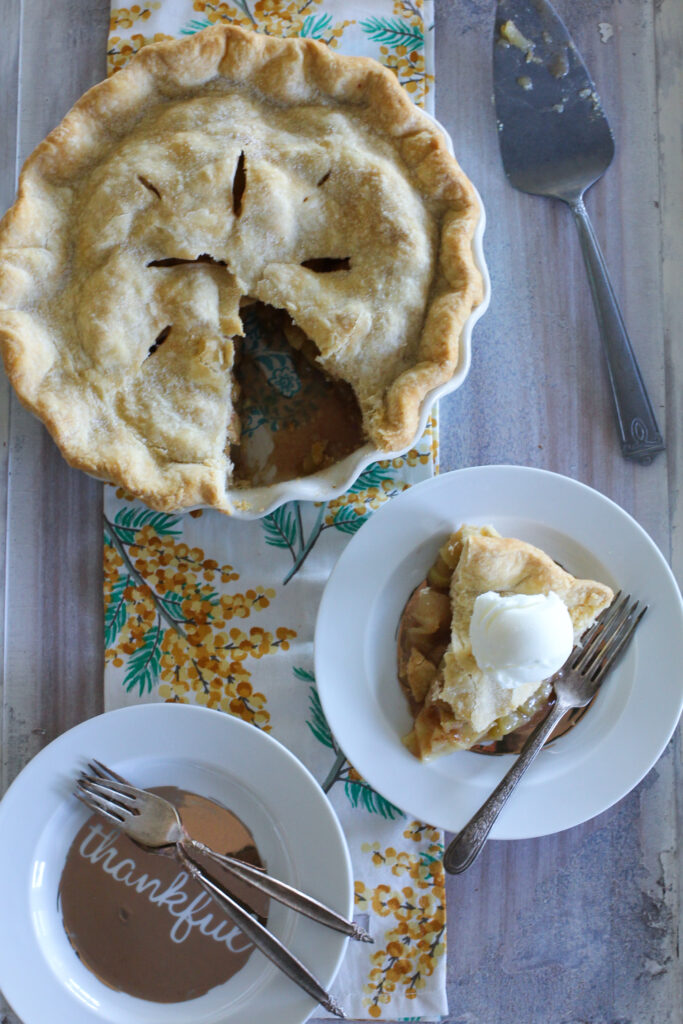
Without a doubt, my Mom’s apple pie is our family favorite, and has been for three generations! This classic apple pie is everything we love in homemade apple pie. My mom’s apple pie recipe probably originated from her BH&G cookbook or a BHG magazine. It is made with fresh sliced Granny Smith Apples and a flaky crust that is out of this world delicious!
What makes the best easy apple pie recipe in the world? Pull up a chair, and get comfy. Let’s talk apple pie. I’ve been making pie since I was 18 years old. I’m now closing in on 59, so that’s over 40 years of pie making. Yikes! How time flies.
I learned how to make pie in St. George, Utah, from a sweet woman named Mrs. Barton. She taught me the basics of making delicious and beautiful pies. Today, I’m going to share what I teach at pie making classes. All the tips and tricks with step by step instruction and photos in this post! If you are looking for video instruction, I have baking instructional videos which include a tutorial on how to make this pie.

Best fresh flavor from baking apples in pie, not precooked!
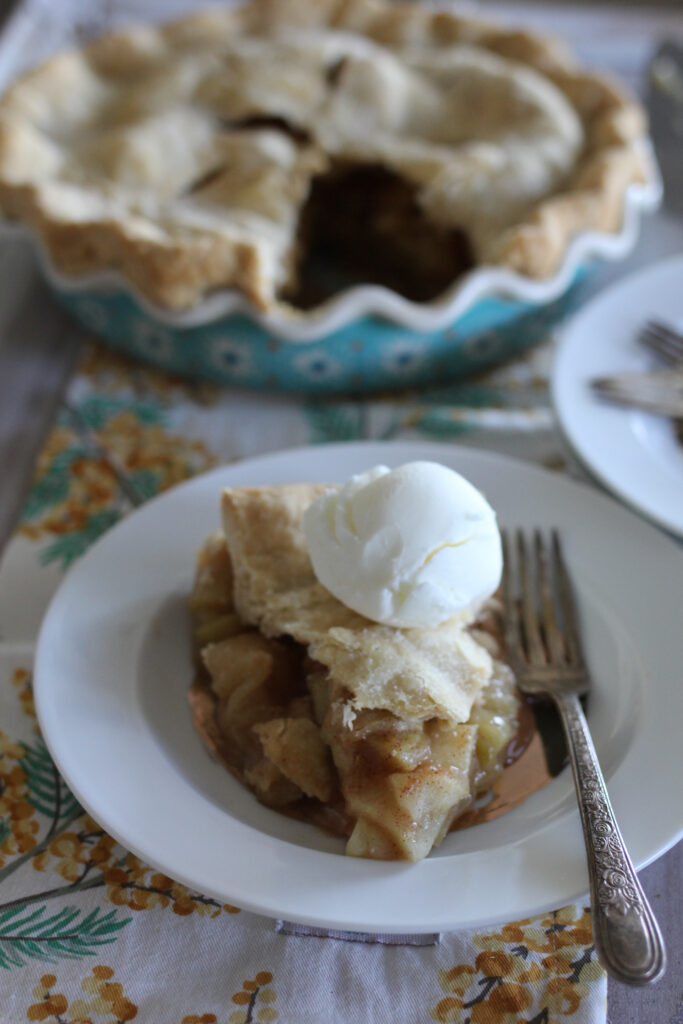
Making apple pie should not be complicated! It is basically peeled and sliced apples, sugar, spice, either flour or other thickener (for the juices in the filling) a bit of butter, vanilla and crust. Minimal ingredients make the best apple pie and crust. I believe the best apple pie is made with fresh apples, baked IN the pie. Some people like to precook the apples on the stove, but I like to let them cook right in the pie for the freshest flavor and best texture.

which apples are best for making apple pie?
I like Granny Smith apples for apple pie. Granny’s are tart and firm and they bake up well. They are also easy to find, affordable and available in most grocery stores. If I happen to have another type of apple in my fridge, I add another variety for more depth of flavor in the pie. Not necessary, but it adds a little interest to the pie filling!

Apple pie filling is easy to make. Simply peel and core the apple and then slice. I have a tool I use for peeling, coring and slicing apples which is worth every penny spent. The Apple-Peeler-Corer-Slicer is a life saver if you are making apple pie! The prep time for apples is cut into seconds (instead of hours), and it will save your hands too! I highly recommend the model that suctions to the counter instead of clamping on.
How many apples does it take to make apple pie?
While we are on the subject of apples, let’s talk about this. How many apples does it takes to make apple pie? Generally, if I am using a 9.5 inch pie plate that is about 1.5 inches deep (not considered deep dish) I use about 6-8 medium to large size apples. Granny Smith’s are usually sold in either what is called a “school size” (very small), or a “medium” or “large” size. If you bunch up your fist (and you are a woman), that is approximately a true medium to large size. Occasionally, I see a very large size, (make a fist, then place your opposite hand over the top of your fist). When measured out after coring, peeling and cutting, I get about 6-7 cups of cut up apples (not packed).

What is the best pie plate for baking a pie?
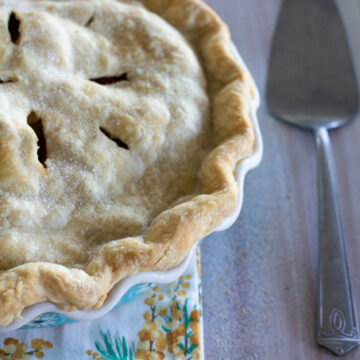
I am a huge fan of using Pyrex glass pie plates for baking pie. I know many bakers recommend a ceramic dish, which I think are lovely and look beautiful…but if you are looking for a pie plate purely for function, I think glass is best. One of the biggest problems (especially beginner pie makers) experience is an under done bottom crust!

The glass pie plate solves this problem because you can take a quick peek at the bottom crust to see if it is golden. Nothing is worse than making a pie and having the bottom crust turn out doughy! I have picked up glass pie plates everywhere from thrift stores for $1, to discount stores such as Homegoods, Ross, and grocery stores as well. If you live in SLC, Orson Gygi carries glass pie plates year ’round online and in store!
How to tell if a pie is done
My secret to a perfectly cooked bottom pie crust is to cook the pie on the lowest level in the oven. Not the bottom of the oven, but the lowest rack setting. This will ensure the bottom crust is cooked and the top layer is not over done! Again, using a glass pie plate will also help make it easy to check on the bottom crust! The bottom crust layer should be golden when cooked properly. If the crust begins to brown too much (turn a dark color) remove the pie from the oven and adjust the rack toward the middle of the oven. Every oven cooks differently!

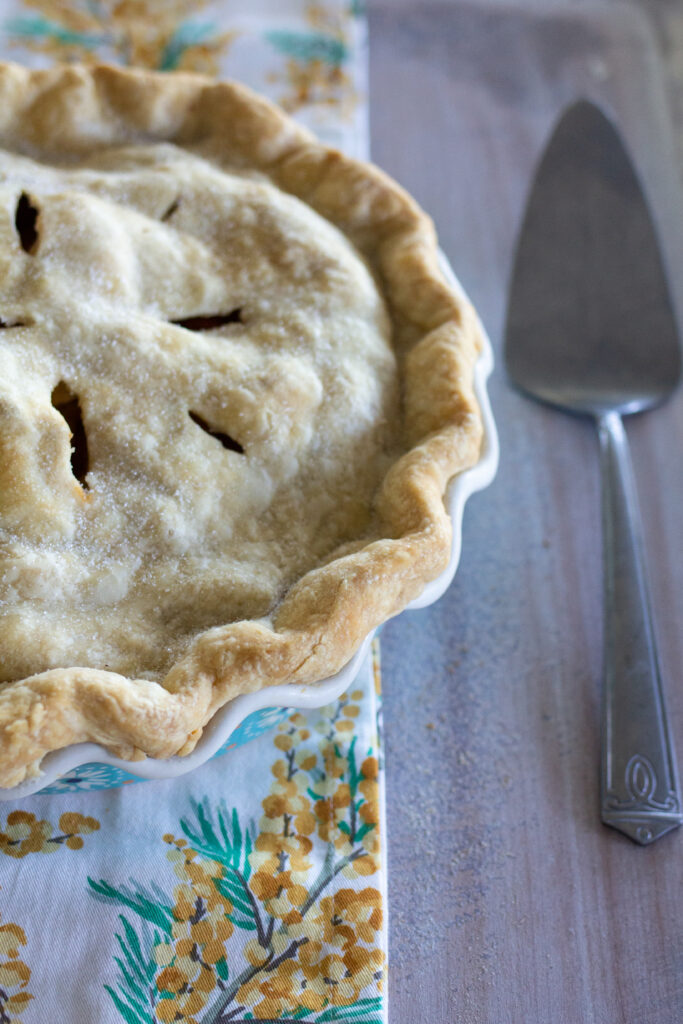
To test the apples for doneness, check first to see if the apple pie filling is bubbling. When the pie is done, the apple filling will be bubbly. This is usually easy to see through the slits in the pie. I have made pies for so long I can tell by the smell of the pie. After you get the hang of making pies, your nose will recognize the scent when a pie is done! The other way to test for the filling to be done is to poke a knife through the slit in the pie. If the knife goes through the apples easily, and the bottom crust is golden, the pie is done!
How long does an apple pie need to cool before cutting?
This is one of the most important pieces of information when cutting into a freshly made pie! We all have that image of eating hot sliced apple pie with slightly melted ice cream on top. One of the biggest mistakes bakers make when serving homemade pie is they don’t allow enough time for the pie to cool!
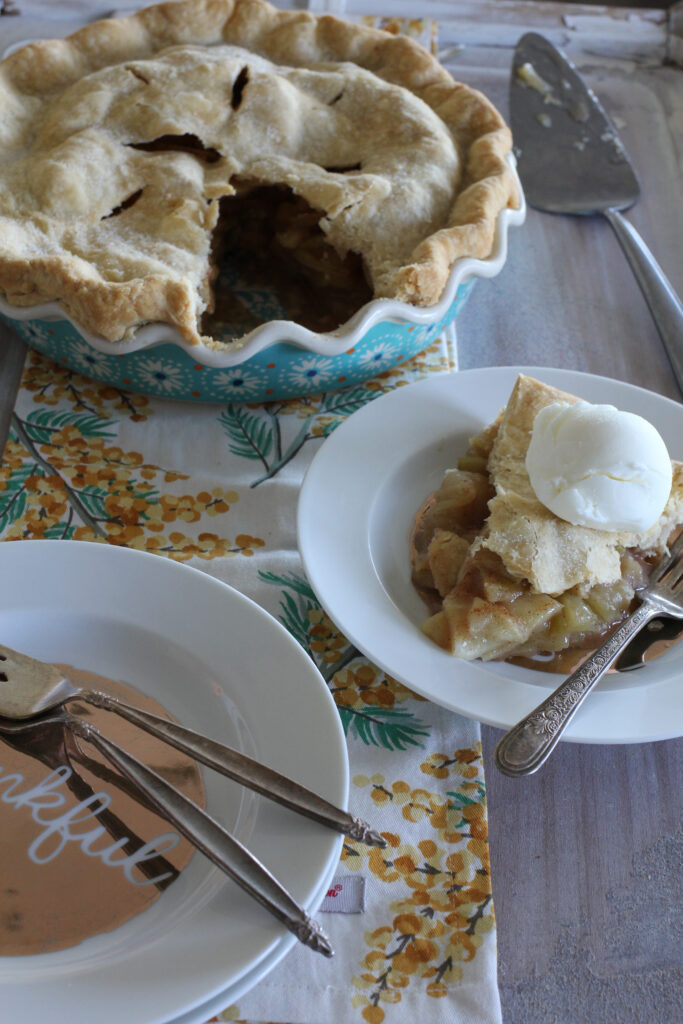
Pie stays hot inside for a couple of hours after baking. After that it begins to cool, and the sugar, butter and flour (thickening agent) begin to work together and solidify. If you cut into a pie right after it is removed from the oven, it never has a chance to set up, and this is one of the main culprits in runny pies! Remember, allow for cooling time when planning to make and serve a pie!
What is the best crust for apple pie?
I have been using the same crust recipe since I started making pies back in 1981. It never fails and produces the best and most flaky pie crust. I believe the best pie crust is made with shortening. I use half Butter Flavor Crisco, and half regular (white) Crisco in this recipe. This crust recipe is very forgiving and easy to work with! For a full pie crust tutorial, see this post.

How to make the Best Easy Apple Pie Recipe in the World:
- Make the pie crust. Roll out bottom crust and place in pie plate.
- Peel, core and slice the apples.
- Toss the apples with sugar, flour, spices, salt, vanilla and lemon juice.
- Place the apples in the pie plate lined with dough. Dot with butter.
- Roll out the top crust, cover the apples.
- Crimp edges, cut slits for steam to escape. Top the pie with egg wash and sugar.
- Bake.
- Let cool for a minimum of 2 hours.

Best Easy Apple Pie Recipe (Mom’s Apple Pie)
Ingredients
please read all of the recipe notes and gather all of the recipe ingredients before baking!
Apple pie filling:
- 8 large apples -I like Granny Smith , the amount of apples will vary depending on how deep of a pie plate used-see recipe notes
- ¾ cup granulated sugar
- 1 teaspoon cinnamon
- ½ teaspoon nutmeg, optional
- ½ teaspoon sea salt
- 3-4 tablespoons all purpose flour
- 2-3 teaspoons lemon juice or about 1/2 fresh squeezed lemon, optional, but recommended
- 2 teaspoons vanilla extract, optional
- 1-2 tablespoons butter
- 1 beaten egg, optional
- sugar for top of pie
Pie crust:
- 1 cup solid shortening (Crisco), 1/2 butter flavor, 1/2 regular
- 2 cups all purpose flour
- 1 teaspoon salt, preferably sea salt
- 1/2 cup cold water, ice water is best, no ice in the dough
- 1 cup additional flour for rolling out and adjusting dough
Instructions
Prepare oven and preheat:
- Preheat the oven to 375 for 30 minutes before baking. Adjust the racks so one rack is on the bottom of the oven (lowest setting) and one is in the middle of the oven.
- It is best to bake the pie on a thin cookie sheet to prevent any overflow of filling from the pie onto the oven. You may also use a sheet of foil placed under the bottom of the pie plate to catch drips.
Crust:
- Place flour and salt in a large bowl. Toss together.
- Using a pastry cutter, cut shortening into flour mixture until mixture resembles small peas or small pea size pieces.
- Add the water all at once pouring evenly around the flour in bowl. Gently fold the flour mixture together with a fork until the dough begins to form a ball. At this point, the dough will be quite sticky. If needed, add a little flour so the dough is not sticky to the touch.
- Flour the pastry mat or countertop generously. I use about 1/4-1/3 cup of flour. Split the dough in half and roll out half of the dough into a circle, about 2 inches larger than the edge of the pie plate.
- Place the rolled out dough into the pie plate. I fold the dough in half and then transfer to the pie plate. After the dough is in the pie plate, unfold and evenly place in the plate, making sure the dough completely rests against the bottom corners of the pie plate. Roll out the second part of dough and let sit while the filling is being made. The dough may be placed in the fridge while filling is being made. No need to cover.
Pie filling:
- Peel, core and slice apples. Set peeled apples in a large bowl. Trim off any excess core or peel if needed.
- Add sugar, spices, salt, flour, lemon juice and vanilla to the apples and toss well.
- Fill the bottom crust with apple filling mixture. Pour any of the remaining juices from the apple filling evenly over the apples in the pie plate.
- Cut up butter into small pieces and distribute evenly on top of apples in crust.
- Cover the apples with the rolled out top crust. Seal edges of the pie, and cut slits in crust to allow steam to escape.
- Gently brush beaten egg* (optional) on top of crust and sprinkle with sugar.
- Bake at 375 for about one hour or until the top and bottom crusts are golden and the apples are bubbly.
Notes
- The dough may be easier to handle if chilled for an hour or so, but it is not necessary to refrigerate dough.
- Some people like to “cut” the shortening into the flour with their fingers.
- Don’t cut the flour and shortening too much, the little pieces of shortening are what make the crust flaky, you want to have pebble or pea size pieces of dough before adding the water.
- If you choose to use the beaten egg, or an egg white for the top of your pie, only about 1-2 tablespoons of the egg will be used. One egg is usually enough wash for 3 pies.
- Apples vary in size. If using a 9 inch pie plate with 1/5 inch high sides, use 8 cups cut up apples. If using a 9.5 inch size pie plate, use about 9-10 cups sliced apples.
- If your pie is too brown on the edges, but not on top, take a piece of foil, fold in half to make a rectangle, then cut a half circle out of the middle. Unfold and put over your pie. This will protect the edges of the pie from getting too dark!
- Do not stir the dough at any time. Remember, folding the dough is the best way to achieve a light flaky crust.
- See recipe post regarding cooling time. It is possible to speed up the cooling process by placing the pie in the refrigerator on a cool cookie sheet for an hour. Do not cover while cooling.
- I highly recommend not covering an apple pie while sitting at room temperature. The crust will absorb the moisture from the apples and make the crust soft. Always cover if refrigerating or freezing.
- This pie can be made and frozen before baking. Wrap well, with plastic wrap. Freeze. When ready to bake, remove from freezer an hour before baking. Remove any wrapping. Let sit on counter. Bake at 375 on bottom rack for an hour. Then bake on center rack for 15-20 minutes or until the apples are bubbly. If the pie starts to brown too much, place a piece of foil loosely over the pie.
- The pie can also be frozen after baking. Let cool completely. Wrap and freeze. Remove from freezer the day before serving. Remove any wrapping, and rewrap. The wrap that was frozen will often have ice crystals or condensation and will make the crust wet. Thaw in refrigerator for 1 day. On day of serving, place on counter top and serve at room temperature or place in 300 degree oven and warm up, uncovered for about 30 minutes.
Did you make this recipe?
Be sure to leave a comment and rate this recipe! I’d love to see a photo, tag @abountifulkitchen on Instagram!
Mike
This is a great recipe. I had purchased your cookbook and I had a class with you at Orson Gygi. I have packed up all my cookbooks for a move but found myself needing to bake an apple pie for a family event and not having access to my go to recipe. Thanks for making this available online.
Jillian
Hi Mike!
We are so glad that you were able to find this recipe online. Cooking classes are the absolute best!
Happy baking!
Jillian
ABK Team
Rachel
Thank you for this wonderful tutorial! I should have read this before asking my question on your Apple Cranberry Pie recipe.
Heidi hebdon
Another family favorite. My daughter learned to bake pie with this recipe. It is the best! The crust is always so flaky!
Abigail
Is It necessary flavor wise to use half butter flavored crisco half regular? I thought I read the ingredients thoroughly enough yet somehow missed that part. Only purchased regular crisco and don’t want to make another trip out unless It will make a big difference in flavor and deliciousness of the crust 😉 Thank you!
Si Foster
Abigail, It is not necessary flavor wise to use half and half shortening. Your pie will still turn out delicious with just regular shortening! Thanks for reading ABK!
XO,
Si